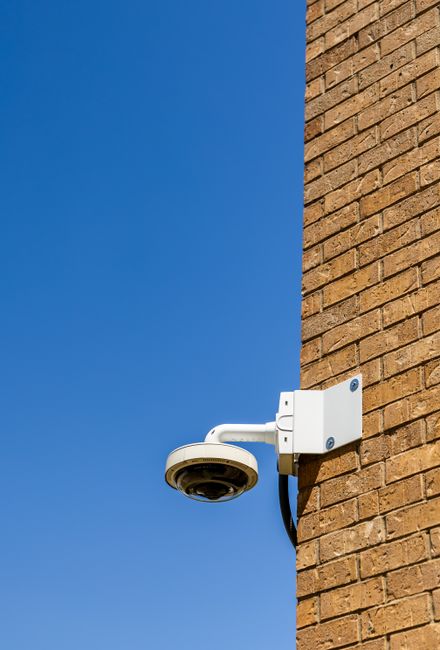
A wall is the easiest place to mount a live camera. The building gives you height, shelter under the eaves and, usually, power and network a few meters away. But walls fail cameras in quiet ways: plastic plugs pull out of crumbly brick, screws only bite into siding, water follows the cable into the house, and a camera that vibrates in the wind makes an unwatchable stream.
This guide covers the common wall types, the right fixings for each, how to bring the cable through, and how to keep it all dry. Always follow the camera maker’s installation guide and the anchor maker’s load ratings; the advice here is general.
What a good wall mount looks like
Fixings by wall type
| Wall | Fix into | Typical fixing | Watch out for |
|---|---|---|---|
| Poured concrete | The concrete | Wedge or sleeve anchors, concrete screws | Rebar; keep edge distance the anchor maker states |
| Solid brick | Sound brick, away from edges | Sleeve anchors, concrete screws, or resin anchors | Old, soft brick: resin anchors hold far better than plugs |
| Hollow block (CMU) | Block web or filled cores | Sleeve anchors sized for hollow block, or resin with mesh sleeves | Thin face shells crack if over-tightened |
| Wood siding or shingles | Studs, rim joist or added blocking | Exterior-rated lag or structural screws | Screws only in sheathing will loosen in wind |
| Vinyl or fiber-cement siding | Framing behind, through a mounting block | Mounting block plus lag screws | Vinyl must be able to move; never clamp it flat |
| Stucco over framing | Framing behind the stucco | Long structural screws through a sealed standoff | Cracking; seal every hole; foam-backed systems (EIFS) need an expert |
| Stone | Solid stone, not the joint | Resin anchors | Heritage buildings may need permission |
Load is rarely the issue: most fixed cameras weigh under 1 kg (the Reolink RLC-811A is 838 g by its spec sheet). Wind and leverage are the issue. A camera on a long arm acts like a lever, multiplying the pull on the top fixings. Use all the holes in the mount, and use stainless steel or hot-dip galvanized fixings outdoors. Near the sea, choose 316 stainless.
The junction box: small part, big difference
Most outdoor IP cameras end in a short pigtail with an RJ45 plug, a power plug and sometimes audio wires. Left hanging on the wall, those connectors collect water, spiders and UV damage. A junction box (also called a back box or conduit box) mounts between the wall and the camera and hides the connections inside.
- Use the box the camera maker lists for your model, so the hole pattern and seal match.
- Put a weatherproof cap or gland on the RJ45 connection, even inside the box.
- Leave a short service loop inside the box so you can re-terminate the cable later.
- If the cable must run on the surface, bring it in through the box’s conduit entry with a proper fitting, not a hole sealed with tape.
Some wall mounts are big enough to hold more than connectors. The Axis T91G61 wall mount for Axis PTZ cameras, for example, has room inside for a midspan (PoE injector) and a service loop, and comes with a pre-mounted Ethernet cable with an IP66 connector, according to Axis.
Bringing the cable through the wall
- Find the inside. Know what is behind the drilling point: wiring, pipes, insulation, a window frame. Use a detector, and drill a small pilot hole first.
- Slope the hole. Drill so the hole rises slightly from outside to inside. Water then drains out, not in.
- Sleeve it. In masonry, a short plastic sleeve protects the cable from sharp edges.
- Drip loop. Where a cable reaches the entry point from above or the side, let it dip below the hole first, so water drips off the lowest point.
- Seal it. Fill the hole around the cable with exterior sealant or an entry grommet. Where the wall is fire-rated, use a fire-stop product that meets your building code.
- Seal the mount. Run sealant along the top and sides of the junction box or mount. Leave the bottom edge unsealed so any water that does get behind it can drain.
Cable choice for walls
Use Ethernet cable rated for outdoor use: UV-resistant jacket, and for direct burial or wet conduit, gel-filled or “direct burial” type. Indoor cable on a sunny wall cracks within a few years. Secure the cable every 30 to 50 cm with UV-stable clips, and keep it away from sharp edges and gutters. For long runs, see PoE cameras: a single Ethernet run can reach 100 m.
Power at the wall
A PoE camera needs no outlet at the wall: power arrives over the network cable from a switch or injector indoors. That is a big reason to choose PoE. If you need a new outdoor outlet for a non-PoE camera, a heater or a router, hire a licensed electrician. In the US, the National Electrical Code requires GFCI protection for outdoor receptacles and weather-resistant, in-use (“bubble”) covers in wet locations. See powering a camera.
Height, safety and access
Most wall cameras go at the eave line or just below it, which puts them 3 to 7 m up. That means ladders. Set the ladder on firm, level ground at about 1 m out for every 4 m of height, extend it at least 1 m (3 ft) above the edge you step onto, and keep three points of contact, following OSHA’s ladder guidance. Do not carry the camera and tools in your hands while climbing; use a tool belt or a rope. Above a single story, or near power lines, use a professional with proper access equipment.
Step by step: a typical wall install
- Plan on the ground. Hold the camera up (or take a phone photo) from the spot to check the view. Mark where the junction box goes and where the cable will run inside.
- Check what is behind. Use a detector for wiring and pipes; in timber walls, find the stud or plan blocking.
- Mark and drill the fixing holes through the junction box template, with the right bit for the wall and the anchor.
- Drill the cable hole, sloping up toward the inside, and sleeve it in masonry.
- Pull the cable with a drip loop outside and a service loop inside the box.
- Fix the junction box, seal its top and sides, and leave the bottom open to drain.
- Connect and cap the RJ45 plug with the maker’s waterproof cap, tuck it into the box and attach the camera.
- Aim and lock. Power up, check the live view on a phone, level the horizon and tighten every adjustment screw.
- Seal the inside hole and tidy the cable indoors.
- Check after the first storm for water, fog inside the lens window or movement.
Common mistakes
- Plastic wall plugs in old, soft brick: they spin and pull out. Use resin anchors.
- Screws into siding or sheathing only: they loosen with every gust.
- A cable hole that slopes down toward the inside: it becomes a gutter into the house.
- Connectors left hanging on the wall, wrapped in tape: water gets in, and the stream drops on rainy days.
- Mounting on a gutter or downpipe: they flex, and the picture shakes.
- Aiming into a neighbor’s window: a privacy problem and, in many places, a legal one.
Wall-mounting options compared
| Option | Best for | Pros | Cons |
|---|---|---|---|
| Flat on the wall with junction box | Bullet, box and turret cameras under an eave | Tidy, strong, cheap | View limited to one side of the building |
| Wall arm (bracket) | Domes and PTZ cameras | Clears the wall; more view to the sides | More leverage and vibration |
| Corner mount | Covering two sides of a building | Wide view from one point | Corners take the most wind |
| Eave or soffit mount | Sheltered cameras looking down | Shelter from rain and sun | Soffits are often thin; fix to rafters |
| Parapet mount | Rooftop views without drilling the roof | Height, no roof penetration | Edge work needs fall protection |
Products that make wall mounting easier
Specs below are the makers’ own, from their product pages, checked 2026-10-07.
AXIS T91G61 Wall Mount
- Room inside for a midspan and service loop
- Pre-mounted Ethernet cable with IP66 RJ45 connector
- Conduit holes for external cable runs
AXIS M1135-E Mk II Box Camera
- IP66, IK10, NEMA 4X casing
- 1080p at 30 fps
- PoE Class 3, 4.4 W average
Whatever camera you choose, check its installation guide for the matching junction box or wall bracket. A matched set seals better than a universal plate.
Keep the stream steady
Vibration ruins live video. A camera that moves a few millimeters on a loose bracket makes the whole image shake, and digital stabilization only helps a little. Tighten every fixing, avoid thin gutters and downpipes as mounting points, and check the mount again after the first big storm.
Do these next
- Check height and direction before drilling.
- Seal and protect it with the right IP rating.
- Respect the neighbors when you aim it.
Questions people ask
How do I mount a camera on brick?
Drill into sound brick away from edges and use sleeve anchors, concrete screws or, for old soft brick, resin anchors. Use stainless fixings and the camera maker’s junction box.
Can I mount a camera on vinyl siding?
Yes, through a mounting block so the siding can still expand and contract, with lag screws into the framing behind. Never screw only into the siding.
Do I need a junction box for an outdoor camera?
It is strongly recommended. It keeps the RJ45 and power connectors dry and out of the sun, hides the cable and gives a better seal against the wall.
Which way should the cable hole slope?
Upward from outside to inside, so any water drains out. Add a drip loop below the entry and seal around the cable.
Do I need an electrician to mount a camera?
Not for a PoE camera on low-voltage cable in most places. A new outdoor outlet or circuit should be installed by a licensed electrician, with GFCI protection and an in-use cover.
Sources
- AXIS T91G61 Wall Mount product page (checked 2026-10-07)
- AXIS M1135-E Mk II Box Camera specifications (checked 2026-10-07)
- Reolink RLC-811A specifications (weight 838 g) (checked 2026-10-07)
- NFPA 70, National Electrical Code (checked 2026-10-07)
- OSHA QuickCard: Portable Ladder Safety (checked 2026-10-07)
- IEC 60529 Degrees of protection provided by enclosures (IP Code) (checked 2026-10-07)
Last reviewed October 7, 2026 by the LiveLocation team. General information, not legal or electrical advice.